
Step-by-Step Guide: Setting up a Thermal Receipt Printer on Windows with Ethernet Connection
Note: Before you begin, ensure that your thermal receipt printer supports Ethernet connectivity. Also, make sure to check the printer's documentation for any specific instructions provided by the manufacturer.
-
Unpack and Connect the Thermal Receipt Printer
- Unbox the thermal receipt printer and ensure you have all the necessary components.
- Connect the printer to your network using an Ethernet cable. Connect the other end of the cable to a network port or router.
-
Power On the Thermal Receipt Printer: Plug in the thermal printer and turn it on. Wait for it to initialize.
-
Obtain the Printer's IP Address
- Check the printer's display or configuration settings to find its IP address. This information is crucial for connecting the printer to your Windows PC.
- Open Control Panel > Hardware and Sound > Devices and Printers. Right-click the printer and select Properties. Look in the Web Services or Ports tab to see your IP address.
-
Install Printer Drivers
- Insert the driver CD that came with the thermal printer into your computer. Follow the on-screen instructions to install the necessary drivers. If your printer doesn't have a CD, visit the manufacturer's website to download the latest drivers.
- Example of printer drivers: EPSON Advanced Printer Driver 6 for TM-T82X (Windows)
-
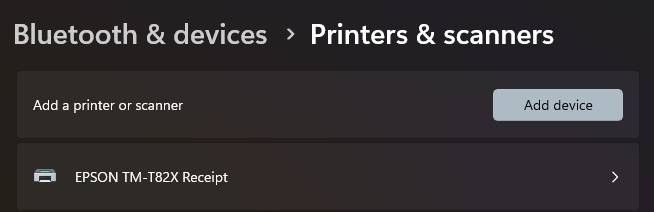
Check Printer Connectivity: Confirm that the thermal printer is properly connected to your network. You can do this by accessing Bluetooth & devices > Printer & scanners.
-
Configure Paper Settings
- Open the "Printers and Devices" window and right-click on your thermal printer.
- Choose "Printing preferences" or "Printer properties" to configure paper size, orientation, and other settings based on your requirements.
-
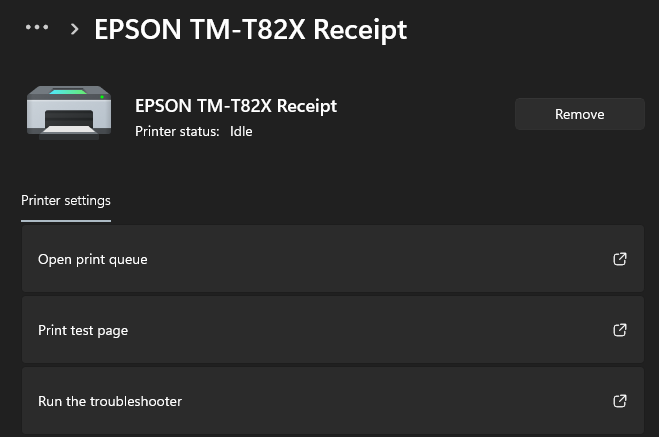
Test Print: Print a test page to ensure that your thermal printer is functioning correctly. Left-click on the thermal printer and find the "Print Test Page" option.
-
Troubleshooting (if necessary)
- If you encounter any issues, refer to the printer's manual or visit the manufacturer's support website for troubleshooting guides.
- Congratulations! You have successfully set up your thermal receipt printer on Windows with an Ethernet connection. It should now be ready for use with Take App Receipt printing